Showing posts with label windows 7. Show all posts

Log in directly into Windows without entering password

Usually when start your windows (xp, windows 7 or windows 8), you will be enter your user name and the password to be able login in to windows. This is very usefull to protect your PC from another user from unauthorized access and other users should be do it too. Your personal data will be safe from another person. But if you are the one person who use the computer, you may can using this trick to pass the login in to windows without entering the password.

This is the trick to be able to log in to Windows without entering any user name or password.
  1. Press Win + R to open Run and then type control userpasswords2 and press enter
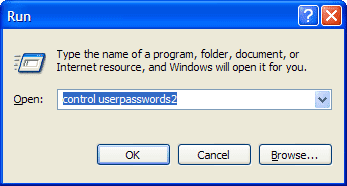
    control userpasswords2

  2. Uncheck Users must enter a user name and password to use this computer and click OK.

    Users must enter a user name and password to use this computer

  3. Restart the computer, and you will not be asked to enter your username and password

Download Waterfalls theme pack for Windows 7

If you like beautiful display theme for your windows 7 computer, you may should be try this theme. This theme released by Microsoft contains 10 beautiful images of waterfalls. Just double click at theme pack to install it to your windows 7.

Waterfalls themme pack for windows 7

You can download waterfalls theme pack from here

Download Best of Bing 5 Theme for Windows 7

There is now a best of Bing 5 theme for windows 7. Previously Microsoft has released a Best of Bing 1 theme, 2 theme Best of Bing, Best of Bing 3 theme, Best of Bing 4 theme. Explore the sweeping landscapes and dramatic images from around the globe in this free Windows 7 theme.

Bing Theme


List all version of windows 7

Windows 7
Windows 7 is the operating system Microsoft's product that highly successful. Many user has upgraded to windows 7 operating system. Besides that, windows 7 has support all software and hardware.
Below is a list of windows 7 version :
  1. Windows 7 Starter
    Windows 7 Starter is the edition of Windows 7 that contains the fewest features. Windows 7 Starter is only available in a 32-bit version. The Windows Aero theme is not included in this version. The desktop wallpaper and Visual Styles (Windows 7 Basic) are not user-changeable. Microsoft originally intended to restrict the edition to running three simultaneous applications but this limitation was dropped.
    This edition is available pre-installed on computers, especially netbooks, through system integrators or computer manufacturers using OEM licenses.
  2. Windows 7 Home Basic
    Windows 7 Home Basic is available in "emerging markets", in 141 different countries. Some Windows Aero options are excluded along with several new features. Home Basic, along with other editions sold in emerging markets, include geographical activation restriction, which requires users to activate Windows within a certain region or country.
  3. Windows 7 Home Premium
    This edition contains features aimed at the home market segment, such as Windows Media Center, Windows Aero and multi-touch support.
  4. Windows 7 Professional
    This edition is targeted towards enthusiasts and small-business users. It includes all the features of Windows 7 Home Premium, and adds the ability to participate in a Windows Server domain. Additional features include operating as a Remote Desktop server, location aware printing, Encrypting File System, Presentation Mode, Software Restriction Policies (but not the extra management features of AppLocker) and Windows XP Mode. Like Enterprise, Microsoft will support this edition until 2020.
  5. Windows 7 Enterprise
    This edition targets the enterprise segment of the market and is sold through volume licensing to companies which have a Software Assurance contract with Microsoft. Additional features include support for Multilingual User Interface (MUI) packages, BitLocker Drive Encryption, and UNIX application support. Not available through retail or OEM channels, this edition is distributed through Microsoft Software Assurance (SA). As a result it includes several SA-only benefits, including a license allowing the operating of diskless nodes (diskless PCs), the running of multiple virtual machines, and activation via VLK.Like Professional, Microsoft will support this edition until 2020.
  6. Windows 7 Ultimate
    Windows 7 Ultimate contains all of the same features as Windows 7 Enterprise, but unlike the Enterprise edition, it is available to home users on an individual license basis. Windows 7 Home Premium and Windows 7 Professional users are able to upgrade to Windows 7 Ultimate for a fee using Windows Anytime Upgrade if they wish to do so. Unlike Windows Vista Ultimate, the Windows 7 Ultimate edition does not include the Windows Ultimate Extras feature or any exclusive features as Microsoft had stated.However, even though it is the consumer equivalent to Enterprise, like Home Premium, Microsoft will only support Ultimate until January 2015.
More details please visit this source page

How to Enable gpedit.msc in Windows 7 Home Premium, Home Basic and Starter Editions

Windows 7 has released with several version, beginning windows 7 Starter into Windows 7 ultimate. Which distinguishes between the versions is its completeness. In the version of windows 7 starter, home basic and home premium, there is no feature or group policy editor gpedit.msc.

In order for the windows starter, home basic and home premium are features of group policy editor, then you can add it by install the group policy editor installer. You can download it on the download link below.

 
This file is a ZIP file, extract it using WinRAR or 7-Zip. Run the extracted setup.exe file and you'll be able to access gpedit.msc command via RUN or startmenu search box.

How to change default windows 7 languages into your own languages

For default language of windows 7 is English depend where you buy it. Several of user better than like to change default language of windows 7 to their languages as default language. Maybe they are feel more familiar to used it.

You can change the default language of windows 7 to your own language (if available) with this way :
  1. Visit this address, then choose the language what you want ( albanian, arabic, Bengali, Bosnian, chinese, etc) and click download.

    change default windows language

  2. Choose your type system of windows 7 32 bit or 64 bit
  3. If download finish, open LIP file by double clicks.
  4. Follow the instructions step by step
  5. Log off the computer
After log off, login your computer and look your windows has canged to your own language.

Download Roses Themes for Windows 7

Are you like a flowers? How about the roses ? Known as "the queen of flowers," roses have been valued for thousands of years for their beauty and fragrance. Now Microsoft released roses themes for windows 7. If you like this you can download it by using the following link bellow.

roses themes for windows 7

Download bubbles theme pack for windows 7

bubbles theme pack

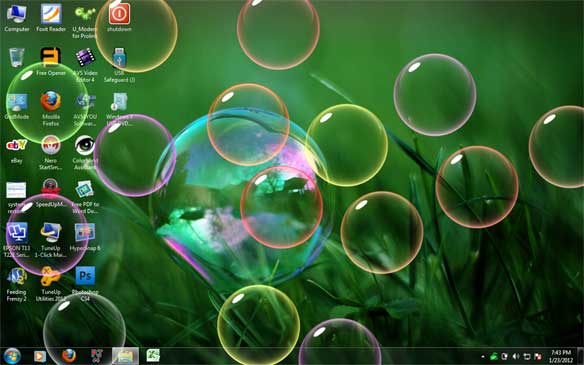
Microsoft has released bubble theme for windows 7. This theme is very interesting to used. Desktop wallpaper display about bubbles so the kids will like this. Besides that, the screen saver show as a bubbles that can move on the desktop like a real bubbles. If you want to bubbules screen saver and bubbles theme you can use follow link to download

List of keyboard shortcuts in Windows 7

For some users, the keyboard shortcut is very important for improving productivity. By using the keyboard shortcut user can save time for display applications compared to using a mouse. If you prefer using keyboard shortcuts, here are some keyboard shortcuts in Windows 7:
  • Windows key + UP Arrow : maximize the window
  • Windows key + Down Arrow : Minimize the window
  • Windows key + Left Arrow : The windows to the left
  • Windows key + Right Arrow : the right flat The windows
  • Windows key + Home : minimize all windows
  • Windows key + P : To display the projector's menu
  • Alt + F4 : Closes the currently active window
  • Alt + Tab : move to next window
  • Windows + Tab button : To switch between windows
  • Windows key + T : To move between items on the taskbar
  • Windows key + M : Minimize all windows
  • Windows key + Shift + M : To return the state before the minimized
  • Windows key + D : Show desktop
  • Windows key + Space : All windows appear transparent
  • Windows key + X : Displays the mobility center menu
  • Windows key + (+/-) : zoom in / zoom out (Magnifier)
  • Windows key + U : Open Access Center
  • Windows key + F : Opens the search window
  • Windows key + E : Opens windows explorer
  • Windows key + R : Opens the Run window
  • Windows key + Pause / Break : Opens the System Properties window
  • Ctrl + Shift + Esc : Opens the Windows Task Manager

How to install font in windows 7

Some times when you get a job to make artistic teks, you can make it with artistic teks program like Ms Word, Adobe Photoshop, Corel Draw, etc. At doing this job we need some artistic fonts that installed at the computer. This artistic fonts can make your job safely a time. When you installing windows 7, the standart font will be automatic installed to the computer. But another artistic font not yet installed. You may install new font by your self.

Trick to install font to the computer in Windows 7 can be follow this steps :
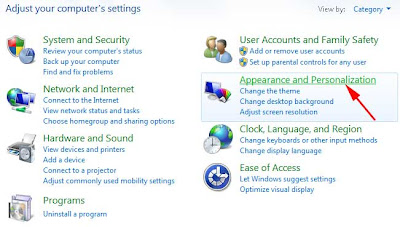
  1. Open Control Panel > Appearance and Personalization, > Fonts.
  2. Click File, and then click Install New Font.
    If you don’t see the File menu, press ALT.
  3. In the Add Fonts dialog box, under Drives, click the drive where the font that you want to install is located.
  4. Double-click the folder containing the fonts that you want to add.
  5. Under List of fonts, click the font that you want to add, and then click Install.

Restore default font in windows 7

Because your activity at your computer, like installed many program or softwares and new fonts or cause anothers activity, your windows now not use default fonts again. This situation become of you not familiar with display fonts in windows. If you want to restore default font in windows 7, you can follow this tricks below :
  1. Open the control panel and then select Appearance and Personalization

    default font settings
  2. At Fonts point, select Fonts setting

    default font settings
  3. Click at Restore default font settings

    default font settings 
  4. Now, your windows will be use default font again

How to disable autoplay on usb flashdisk

autoplay flashdisk

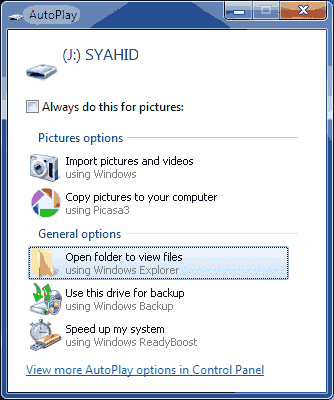
When usb flashdisk or cd, DVD are installed at computer or laptop usually will be expand this drive at windows explorer or another programs. This setting called autoplay. Autoplay make user easily to open their file without expand at windows explorer first. however, autoplay can potentially computer from viruses like trojan, worm, etc. If You want to disable autoplay for CD and pendrive or DVD, You can follow the steps below :
  1. Click start and type gpedit.msc then press enter

    open gpedit
  2. Choose computer configuration/administrative templates/all settings
  3. On the right pane scrool down and double clicks turn off autoplay.

    disable autorun flashdisk
  4. Set to enable. At the option turn off autoplay on, choose all drives and then click apply and OK

    disable autoplay flashdisk 
  5. Do it the same steps on User configuration
Now if you want to open your flashdisk or CD and DVD on computer, you must open that drive with windows explorer and before you expand that pendrive, you should to scan first with antivirus.

FREEDOWNLOAD WINDOWS 7 THEMES

For you who like to change the display of windows 7, surely it would be more easily done by changing theme of windows 7. By changing theme of windows 7, then the display of wallpaper also changed other display. Just by opening that theme, display  personalization of windows 7 has changed to be more beautiful and antique.


You can get the theme windows 7 for free at url below :

How to delete user accounts in Windows 7

Computers are used by many users, should be made ​​user accounts for each one. Therefore will make it easier to manage the files and settings for each user. However, if the user is no longer use their accounts, it should be recommended to the user account is deleted. To delete a user account on Windows 7, the following steps:
  1. Click Start and then type "user accounts" and press enter
  2. Click Manage another account
  3. Select the user account you want to delete
  4. Delete the account
  5. Choose one, delete files or keep files
  6. Delete account
From now on, the user account is deleted

How to use System Restore in Windows 7

System Restore is a feature that very useful to restore the computer system at some previous time. By using system restore, in some instances, you can eliminate the virus in the system. To use the system restore can be done such as following steps:
  1. Click Start and then type system restore and then press enter
  2. You will see a screen restore system files and settings. Click next
  3. Will be seen there a list of restore points and the date when the restore point is created.
  4.  Select one restore point and then click next.
  5. You will have confirmation, and then click Finish
  6. Restart computer
If successful, then your system will return to the previous time. If not successful, you should doing a restore on safe mode.

How To Install Windows 7 step by step

  1. Insert your Windows 7 DVD into dvd rom and boot your computer from DVD Rom.
  2. Now load the setup files.
  3. Select your language to install, time & currency format, keyboard or input method and then click Next.
  4. Click Install now.
  5. Check I accept the license terms and then click Next.
  6. Click Custom (advanced) or Click Upgrade if you already have a previous Windows version
  7. Select the drive where you want to install Windows 7 and click Next.
  8. Installing Windows 7 will start.
    • Copying Windows files
    • Expanding Windows files
    • Installing features.
    • Installing updates
  9. After that it will automatically restart after 15 seconds or click restart now and continue the setup
  10. After restarting, it will continue the setup. This step will take the most time than the previous steps.
  11. Your computer will restart again and continue the setup.
  12. Type your desired user name in the text-box and click Next. It will automatically fill up the computer name.
  13. If you want to set a password, type it in the text-boxes. If you don’t, leave it Type your product key in the text-box and click Next. You can also skip this step and simply click Next if you want to type the product key later. Windows will run only for 30 days.
  14. Select your desired option for Windows Updates.
  15. Select your time and click Next.
  16. If you are connected to any network, it will ask you to set the network’s location.
  17. And now you have a fresh copy of Windows 7 installed on your computer

 
Powered by Blogger | Printable Coupons